blurify.js: How to Blur Images with Ease

Discover the magic of blurify.js, a technique for beautifully blurring images.
In this article, we’ll explain in a beginner-friendly way how to add stunning blur effects to images. For website or blog operators, visuals are incredibly important. Eye-catching design significantly influences a visitor’s impression and guides them to engaging content. blurify.js is a simple yet powerful tool to achieve this. Let’s take a look at how to use it.
What is Image Processing?
Image processing refers to applying various operations to digital images. This includes adjustments, transformations, and the application of effects. On the web, visual representation using images is a key element to draw users’ attention and plays a major role in enhancing the appeal of websites and applications.
What is blurify.js?
blurify.js is a JavaScript library that makes it easy to blur images on a web page. With just a few lines of code, you can add beautiful blur effects to images. It broadens your design possibilities and greatly enhances the visual appearance of your site.
Blurring Images with blurify.js
Before Applying the Blur Effect
Let’s start with the basic preparation before applying the blur effect. Here, we begin with some fundamental CSS settings. To ensure your web page looks tidy, add the following styles. This code adjusts the basic font size and text alignment on the page. Center alignment, in particular, creates a visually appealing layout.
<style>
body {
  margin: 20px 10px;
  padding: 0;
  font-size: 18px;
  text-align: center;
}
h1{
  text-align: center;
  font-size: 22px;
  line-height: 2em;
  padding-bottom: 20px;
}
</style>
Setting the Image in HTML
Insert the image (1.jpg) you want to apply the blur effect to into your HTML. Here, we use the `` tag to add the image to the page, but to apply the blur effect, be sure to specify `class=”blurify”`.
<h1>Blurring Images with blurify.js</h1>

<img data-src="1.jpg" class="blurify" width="800">
Using blurify.js in JavaScript
To add the blur effect to the image, you need to load the blurify.js library on your page and configure the appropriate options. Refer to the code below. Inside the `blurify` function, specify the target image element (in this case, elements with the class `.blurify`), and set the blur intensity and mode.
<script src="blurify.js"></script>
<script>
    (function () {
        blurify({
            images: document.querySelectorAll('.blurify'),
            blur: 6,
            mode: 'auto',
        });
    })();
</script>
By simply adding this code to your web page, the specified image will have a beautiful blur effect applied. You can adjust the blur strength by changing the value of `blur`.
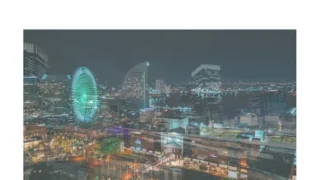
Demo Page: Blurring Images with blurify.js
Let’s see how the blur effect is applied in a real example. You can access a demo page showcasing blurify.js via the link below.
Conclusion
In this article, we introduced how to use blurify.js to add blur effects to images. It can be implemented with just a few lines of code and helps improve your site’s visual appeal. For those running a technical blog, attractive images are a key element in drawing users’ attention. Use this technique to make your site more enjoyable for a broader audience.
*Please use this technique at your own risk if you decide to reuse it.
Do not reuse the Google Analytics tag included in the head tag of the demo page.