How to Set Up Both GA4 and UA in Google Analytics

Currently, when you log in to Google Analytics (UA), you will see the message:
“Starting July 1, 2023, Universal Analytics will no longer process new data in standard properties. Please switch to Google Analytics 4 properties and complete the setup before then.”
Therefore, for those who are currently running new websites or web services, here is a guide on how to set up both Google Analytics GA4 and UA together.
※This method assumes you already have a Google account and have previously used Universal Analytics (UA) in Google Analytics.
Log in to Google Analytics
Google Analytics
Log in.
※From here on, click on images to view enlarged versions.
Create an Account from the Admin Panel
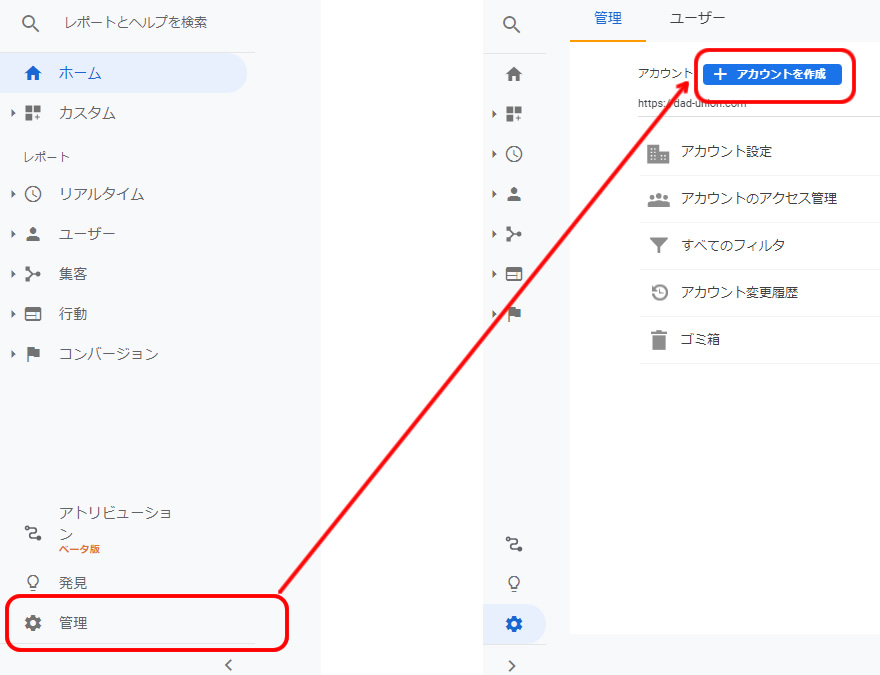
Click the “Admin” button at the bottom left, then click “Create Account”.
Account Settings
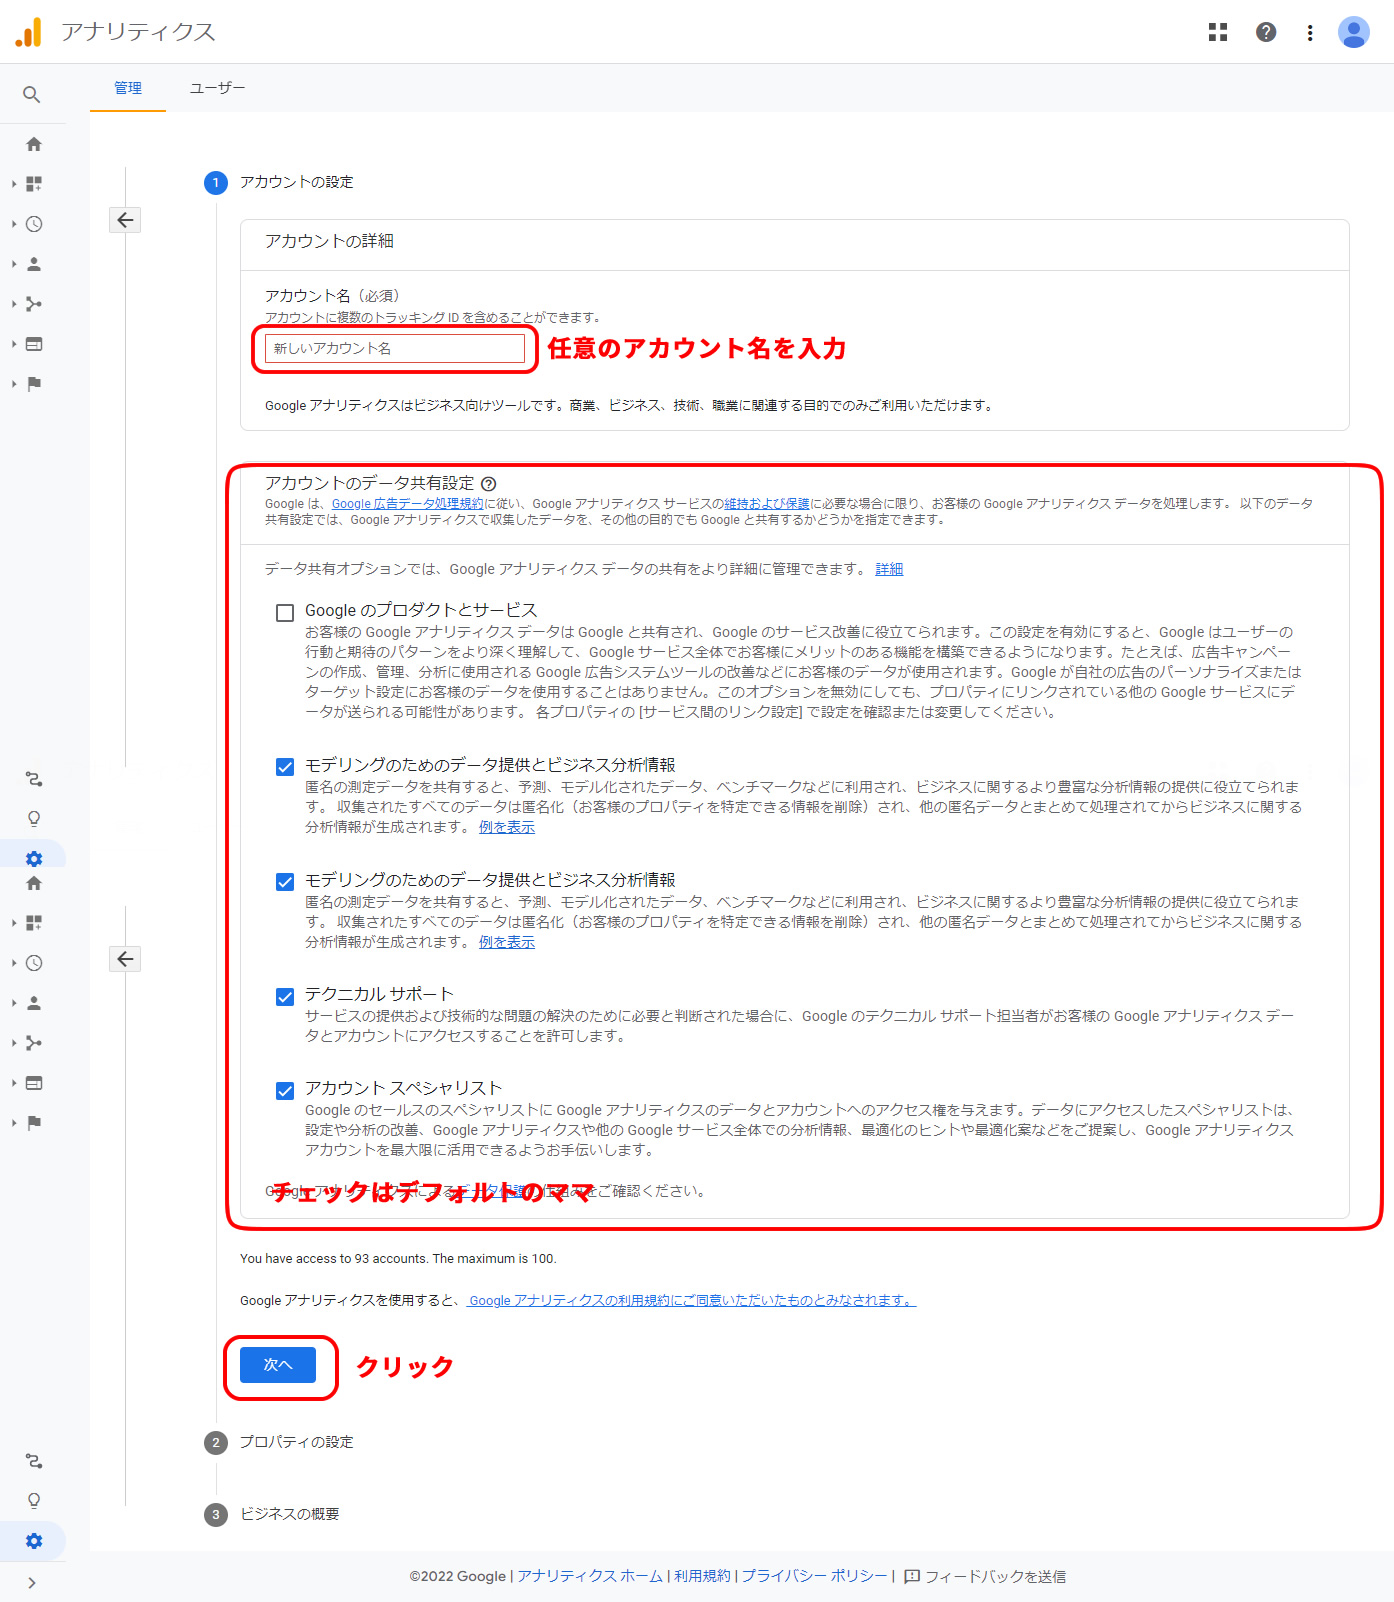
Enter a desired “Account Name”, and you can leave the other checkboxes as default.
Property Settings
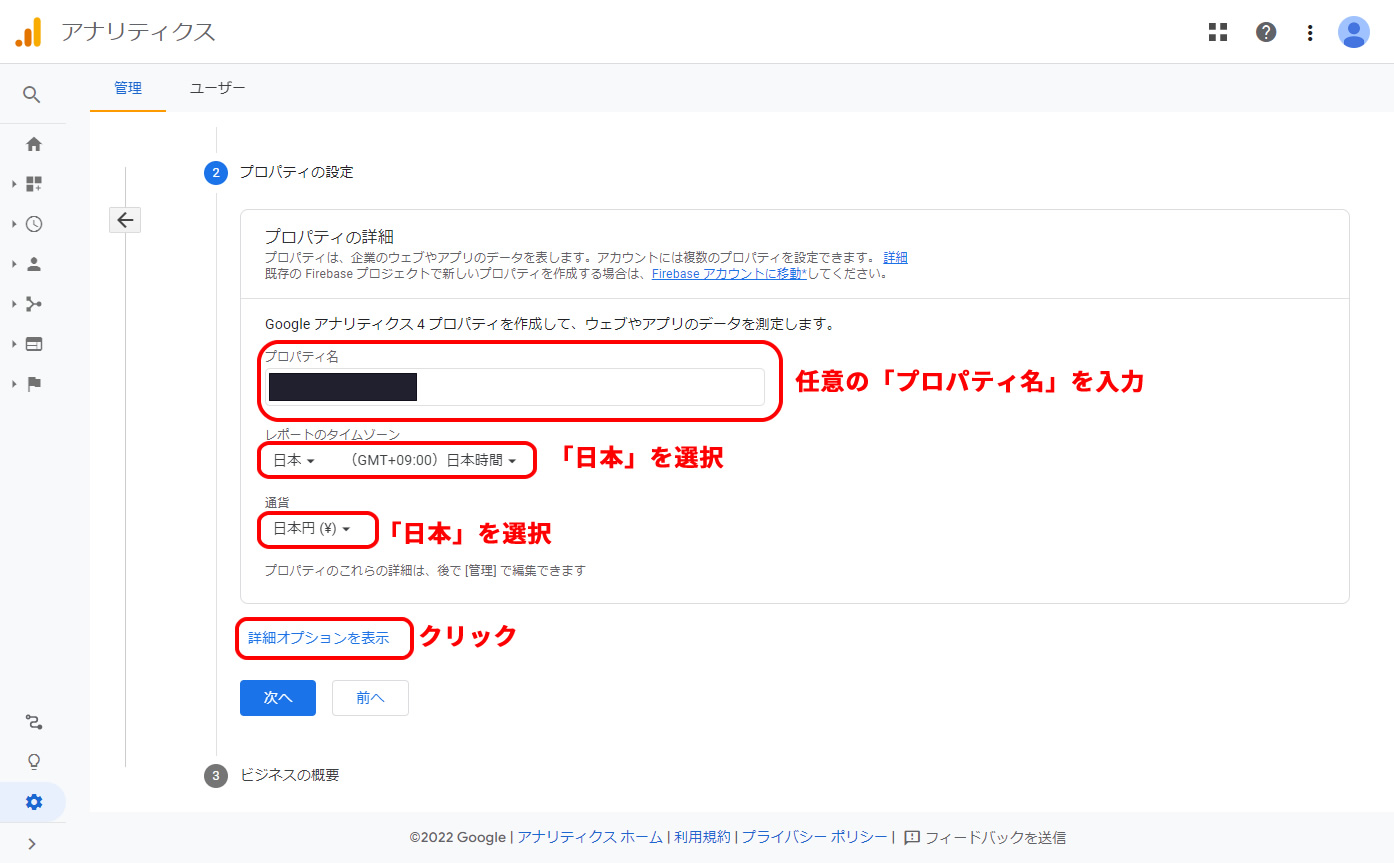
Enter a desired “Property Name”, and select “Japan” for other settings.
Click “Show advanced options”. ※Do not click the “Next” button yet.
Enter the “Website URL” for analysis and select checkboxes as shown in the sample image.

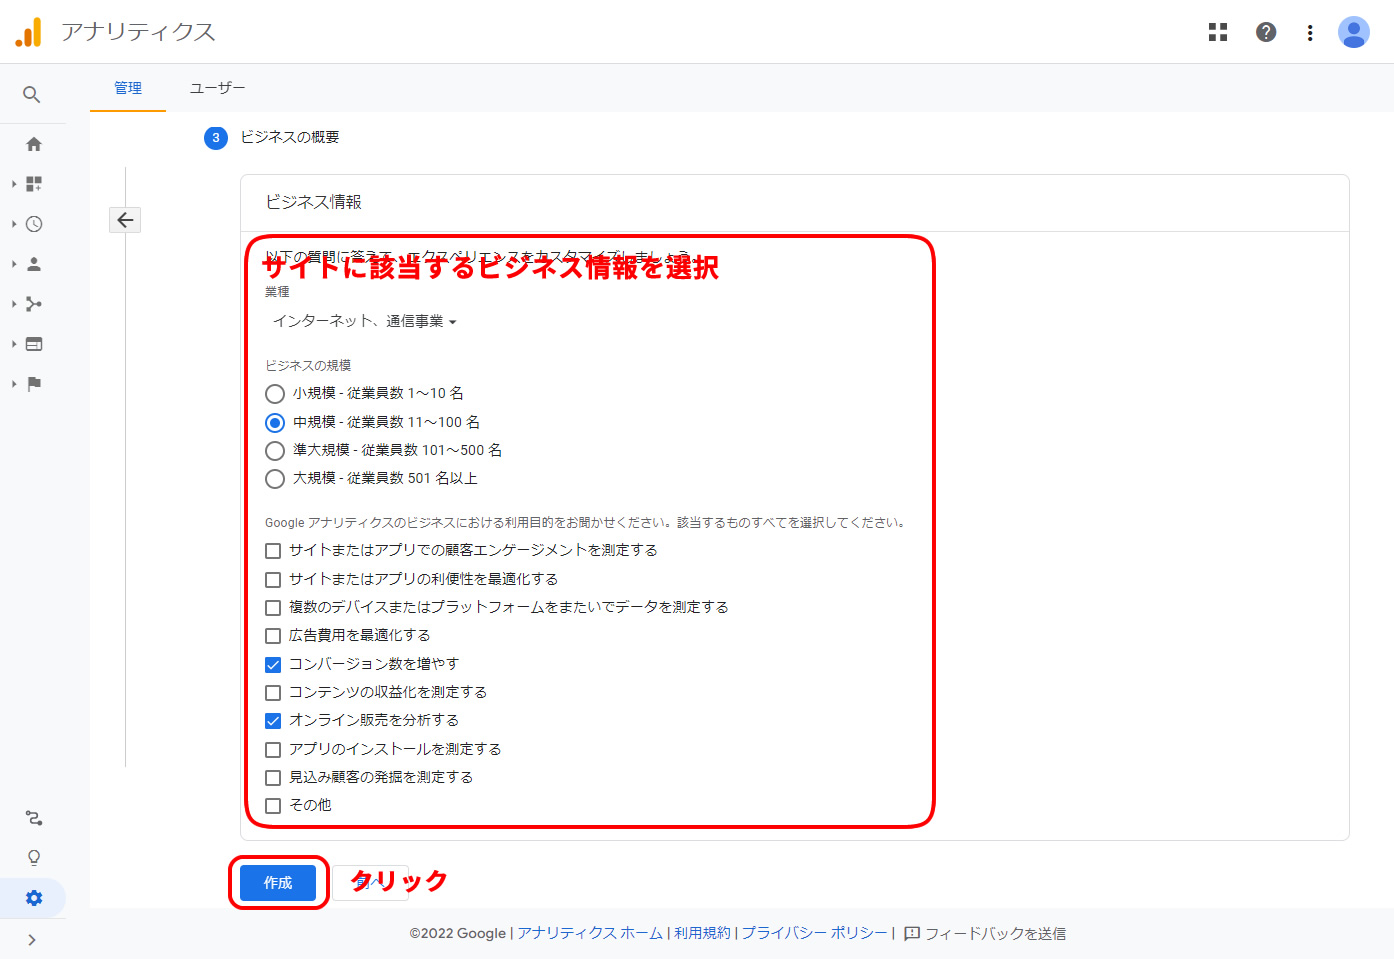
Business Overview
Select the “Business Information” that applies to the site you want to analyze.
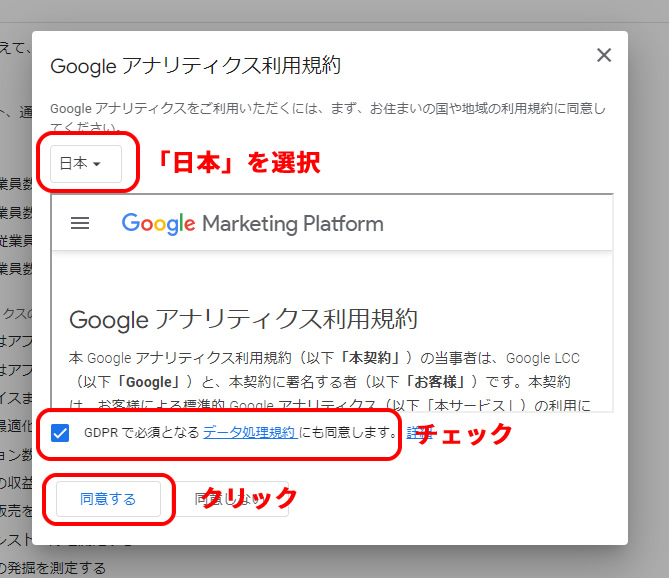
Agree to Google Analytics Terms of Service
On the “Google Analytics Terms of Service” screen, select “Japan” and check the agreement box.
Click the “I Agree” button.
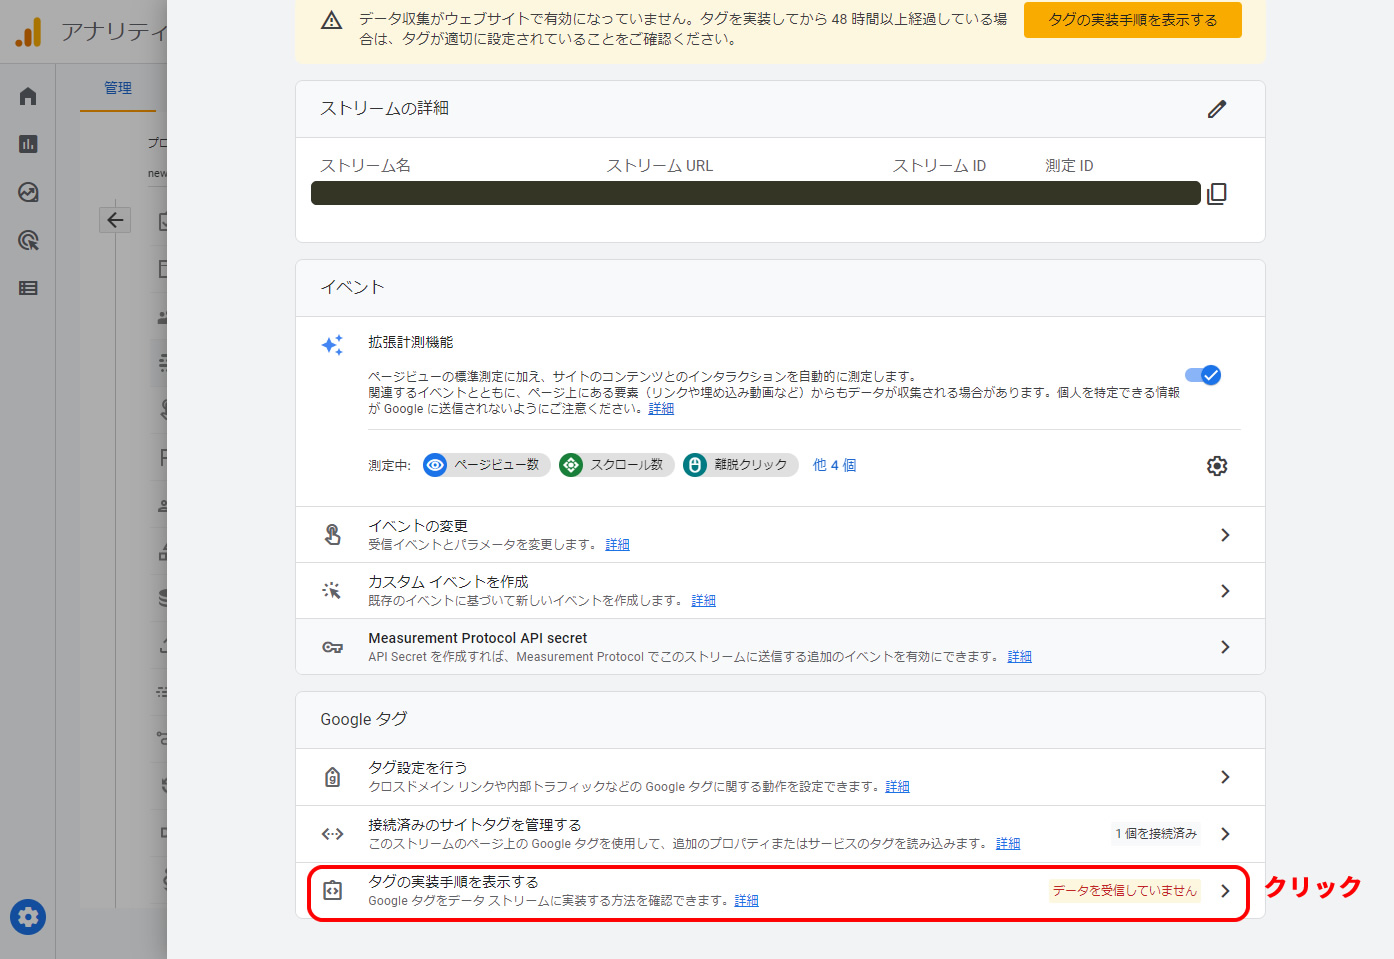
Get GA4 Google Tag
Click “Show instructions for tag implementation”.
Click “Install manually” and copy the GA4 tag, then save it in Notepad or elsewhere.
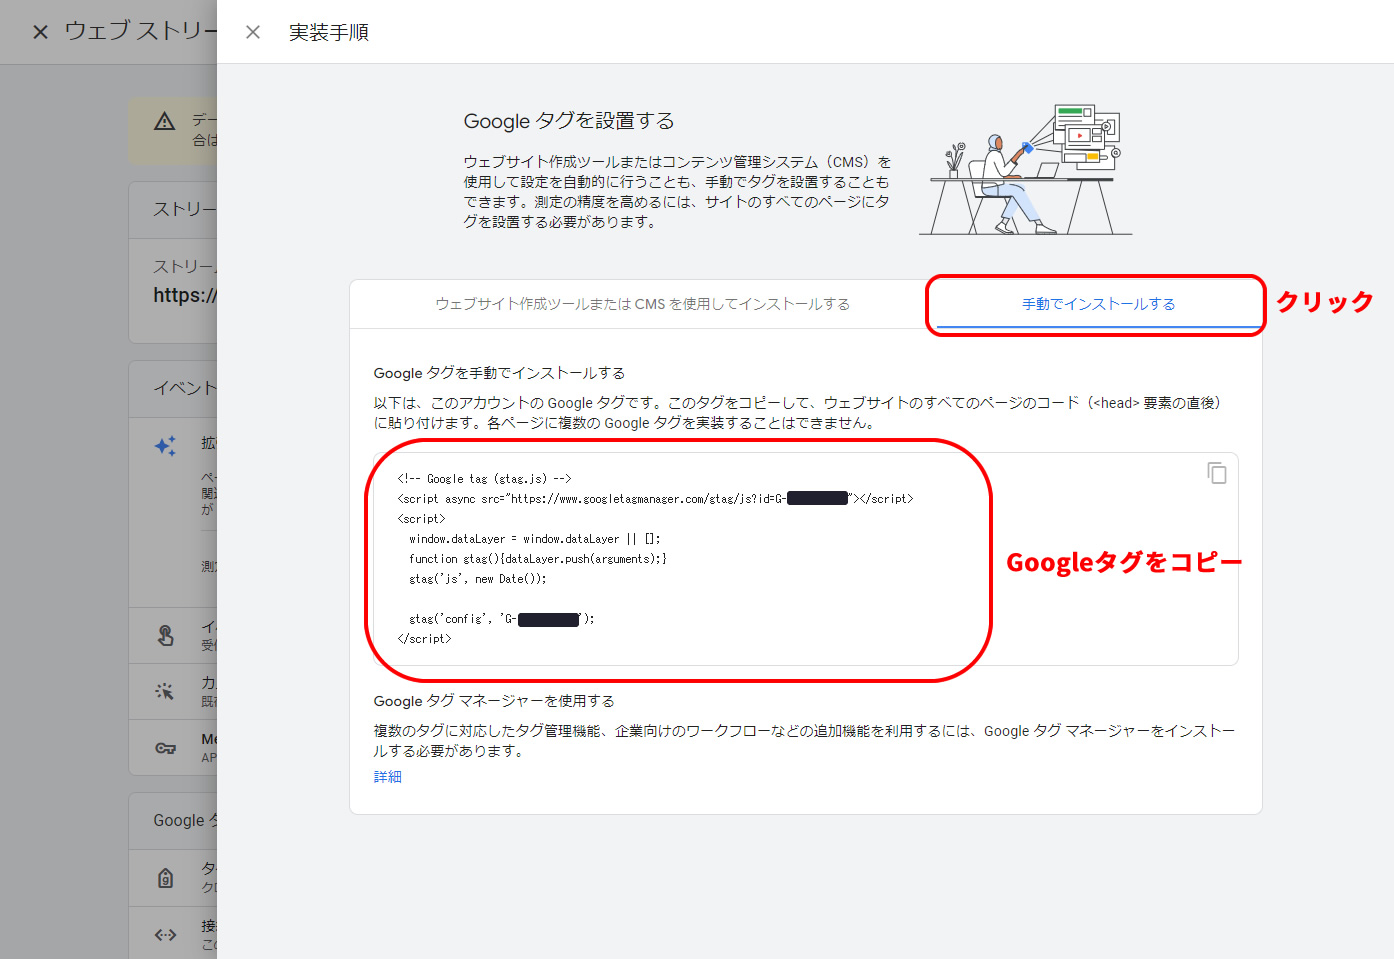
GA4 Tag
<!-- Google tag (gtag.js) -->
<script async src="https://www.googletagmanager.com/gtag/js?id=G-XXXXXXXXXX"></script>
<script>
  window.dataLayer = window.dataLayer || [];
  function gtag(){dataLayer.push(arguments);}
  gtag('js', new Date());

  gtag('config', 'G-XXXXXXXXXX');
</script>
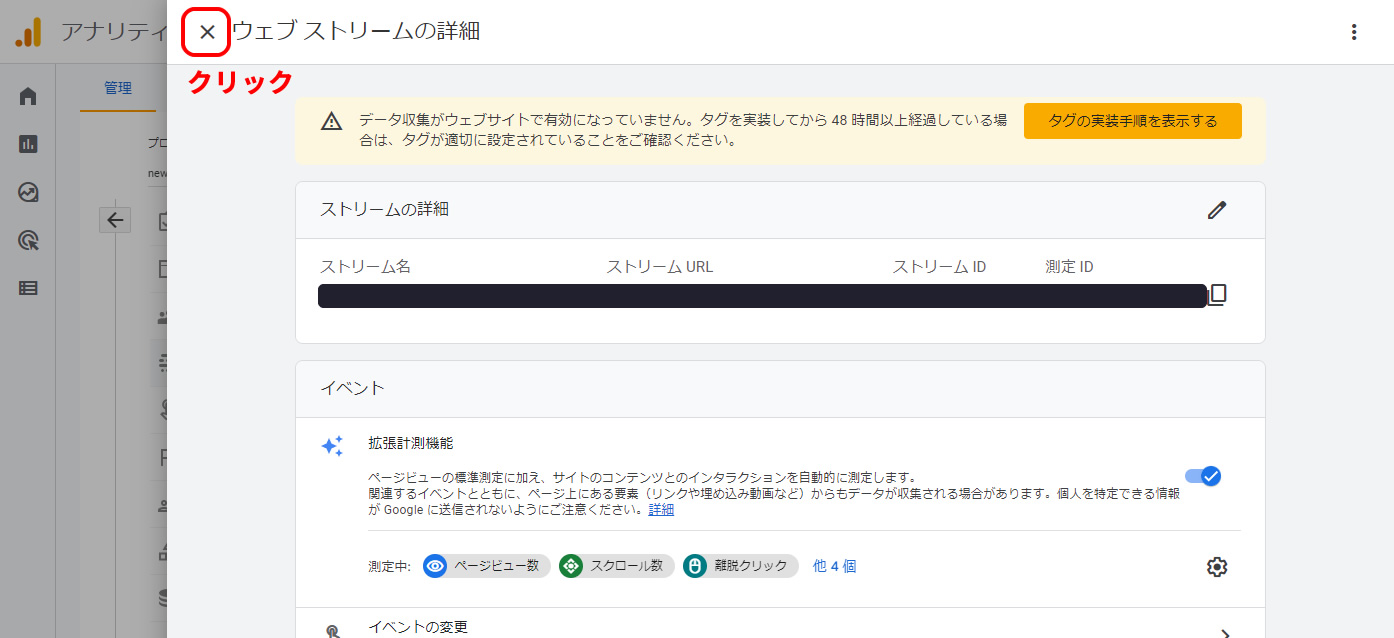
Close the “Web Stream Details” screen in GA4.
Get UA Tag
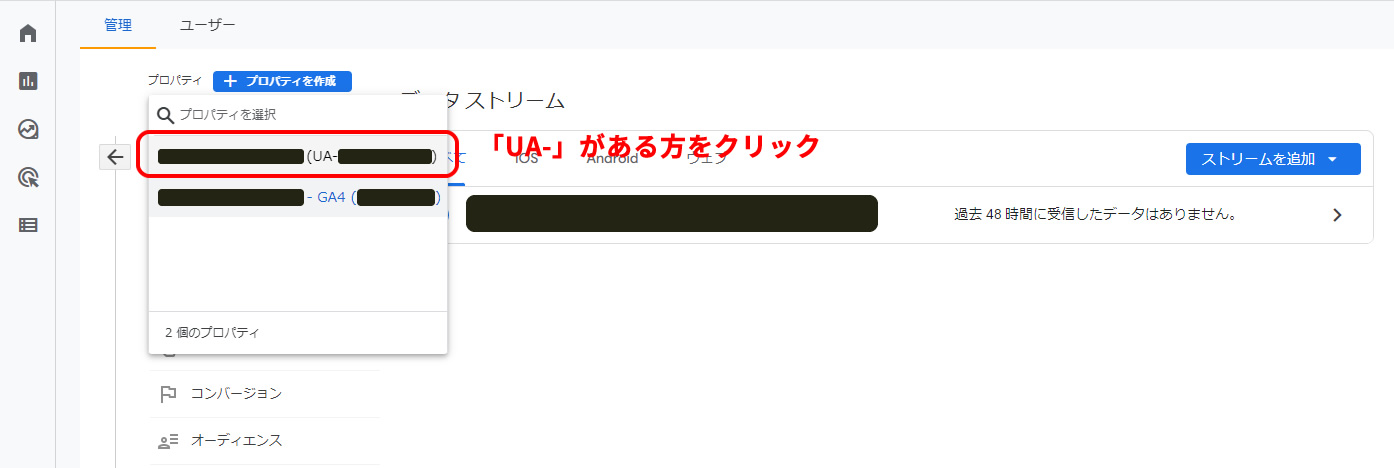
From the GA4 “Property” dropdown, select the one containing “UA-“.
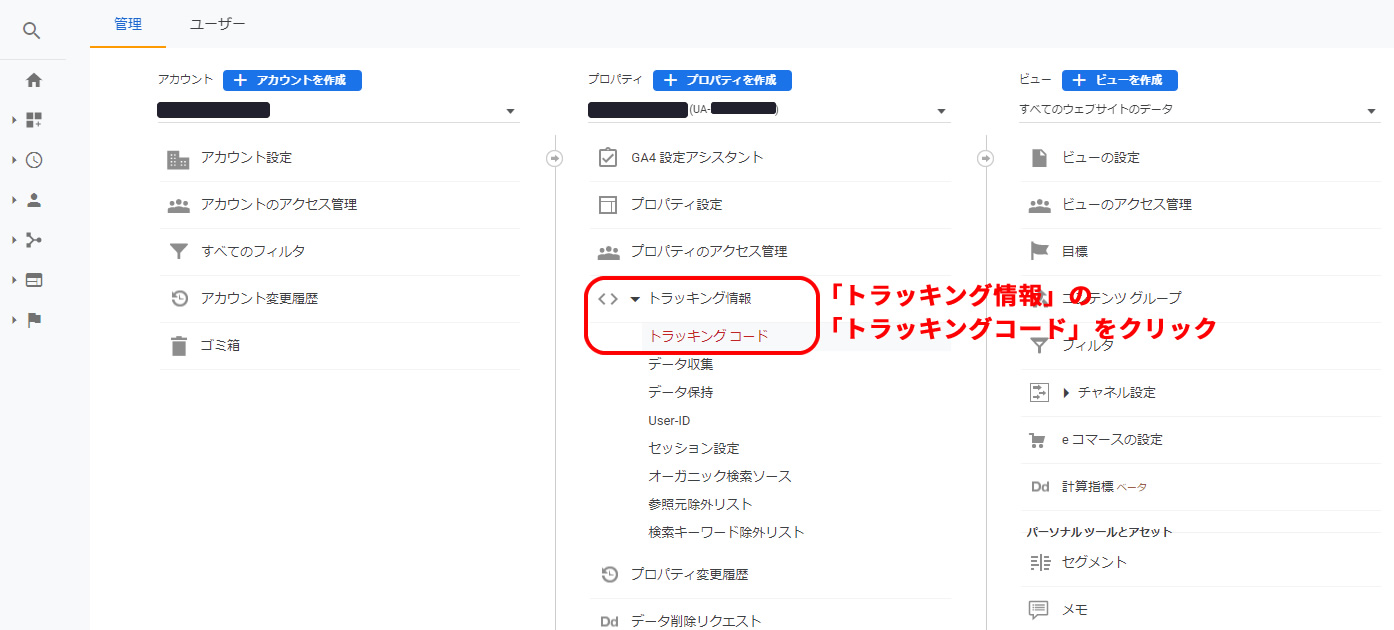
Click “Tracking Info” → “Tracking Code”.
Copy the highlighted line (one line) from the “Global Site Tag (gtag.js)”.

Add the UA Tag Line to the GA4 Tag
Add the one line copied from the UA tag (※line 9 below) into the GA4 tag you saved in Notepad.
<!-- Google tag (gtag.js) -->
<script async src="https://www.googletagmanager.com/gtag/js?id=G-XXXXXXXXXX"></script>
<script>
  window.dataLayer = window.dataLayer || [];
  function gtag(){dataLayer.push(arguments);}
  gtag('js', new Date());

  gtag('config', 'G-XXXXXXXXXX');
  gtag('config', 'UA-XXXXXXXXXX-1');
</script>
※By copying this tag into the <head> of your site, you can track with both GA4 and UA simultaneously.
Confirm UA Analytics Tracking
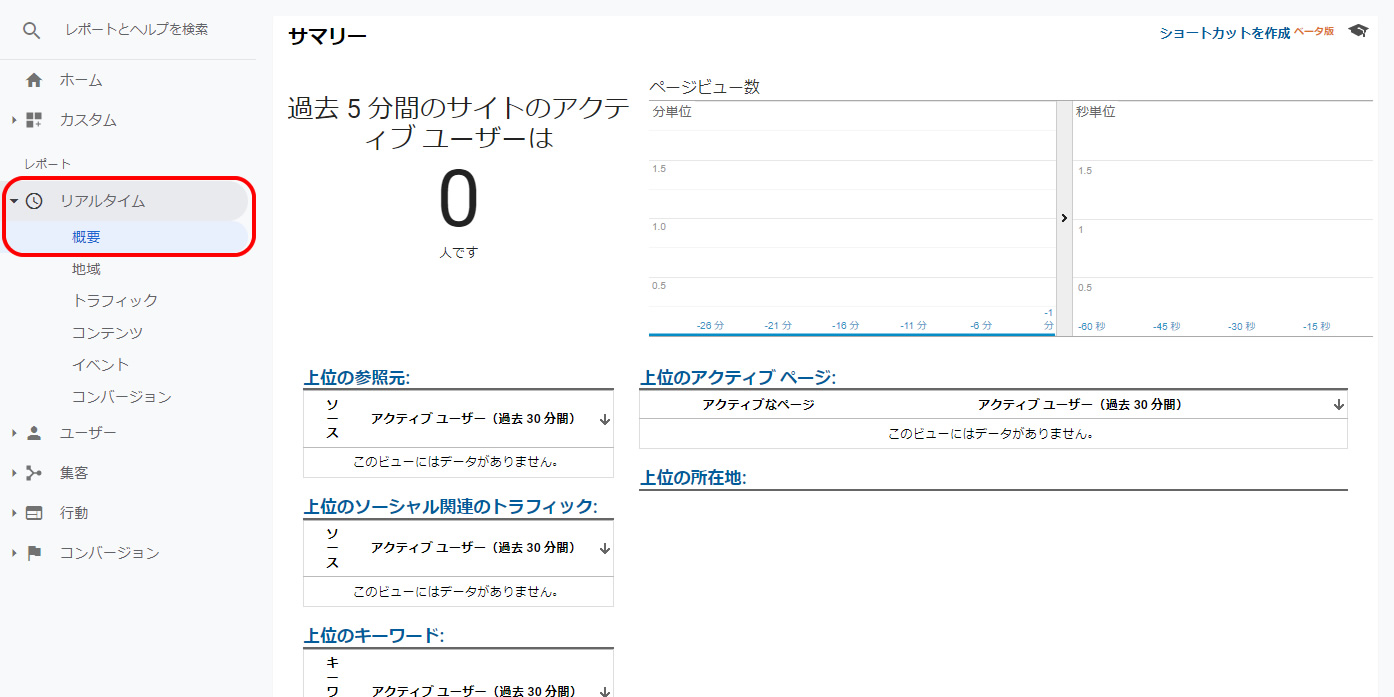
While accessing the site where the tag is installed, go to the UA Analytics dashboard → “Real-time” → “Overview” to check if site visits are being tracked in real time.
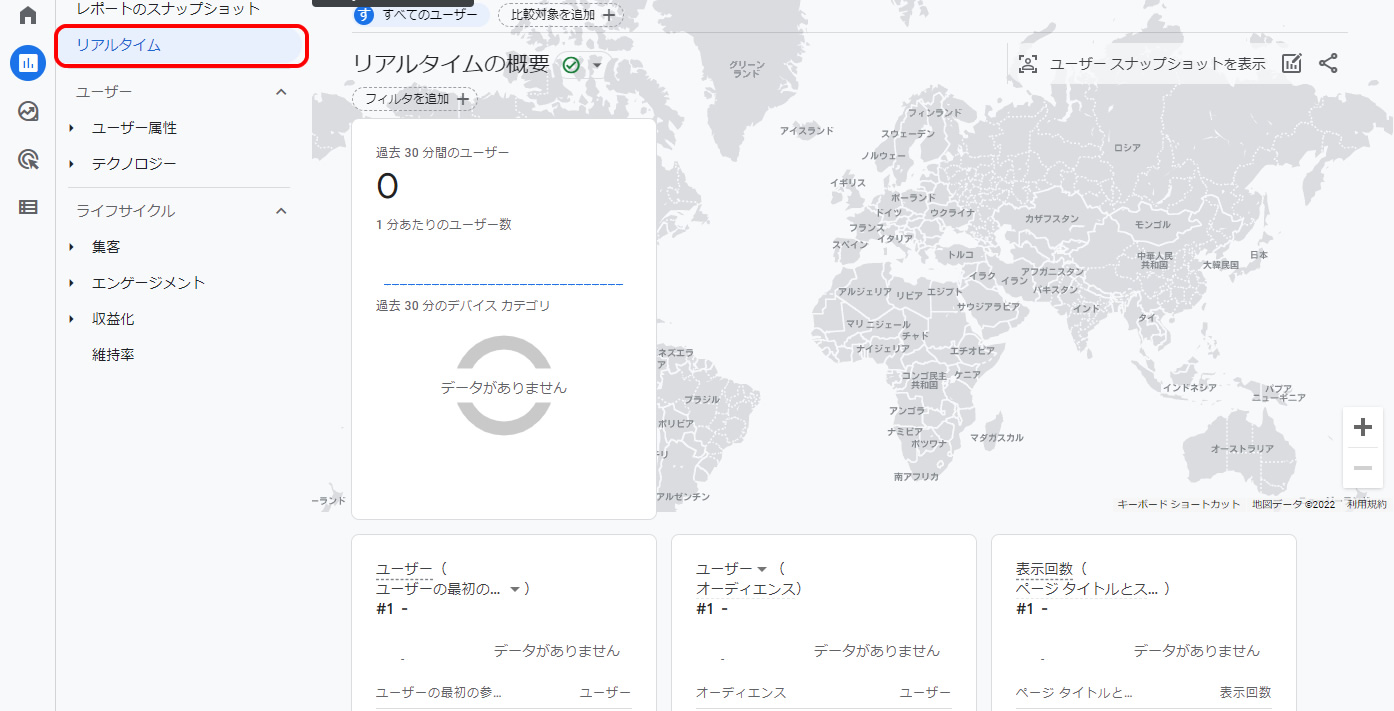
Confirm GA4 Analytics Tracking
While accessing the site where the tag is installed, go to the GA4 Analytics dashboard → “Real-time” to check if site visits are being tracked in real time.
※Please use at your own risk if you reuse this code.