Rotating Multiple Content Areas from Back to Front [jquery.vortex.js]

This time, we will explain in detail how to use “jquery.vortex.js” to display content areas while rotating them from back to front. By using this technique, you can add a dynamic touch to your website and capture the visitors’ attention. I will explain it thoroughly, so please read until the end.
- What is jquery.vortex.js?
- Points to Know Before Implementation
- CSS to Display Multiple Content Areas Rotating from Back to Front
- JavaScript to Display Multiple Content Areas Rotating from Back to Front Using jquery.vortex.js
- HTML to Display Content Areas Rotating from Back to Front
- Demo Page: Display Content Areas Rotating from Back to Front Using jquery.vortex.js
- Conclusion
What is jquery.vortex.js?
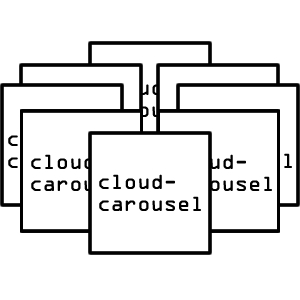
“jquery.vortex.js” is a plugin based on jQuery that allows you to display elements while rotating them in 3D. Unlike regular slideshows or fade-in/out effects, it creates a unique impression using rotation. This tool is particularly useful for websites that require a high level of design or want to use a lot of visual effects.
The appeal of this plugin lies in its ease of use and the ability to fine-tune various options. For example, you can adjust rotation speed, depth, and initial position in detail, allowing you to customize it freely according to your needs.
Points to Know Before Implementation
There are a few things to keep in mind when using this plugin. First, be mindful of the jQuery version. jquery.vortex.js depends on jQuery 1.9.1, so if you’re using a newer version, make sure to check compatibility.
Additionally, the placement and CSS of the rotating elements are crucial. To make the rotation effect stand out, it’s essential that the content is centrally aligned and has appropriate size and margins. This helps maintain visual balance during rotation, making the effect look more appealing.
CSS to Display Multiple Content Areas Rotating from Back to Front
First, let’s write the CSS to set up the elements to be rotated and the multiple content areas. This CSS is crucial as it defines the appearance of the effect.
<style type="text/css" media="all">
<!--
body{
	margin:0;
	padding:0;
}
h1{
	text-align:center;
	font-size:18px;
	font-weight:bold;
	padding:15px 0 10px 0;
	line-height:1.4em;
}
.clWrap{
	width:800px;
	margin:0 auto;
}
#vortex {
	width: 350px;
	height: 250px;
	position: relative;
	z-index: 0;
}
#vortex {
	width: 400px;
	height: 300px;
	position: relative;
	z-index: 0;
	margin:0 auto;
}
.square-button{
	background:linear-gradient(to bottom, #606C88 0%, #3F4C6B 100%) repeat scroll 0 0 transparent;
	width:120px;
	height:120px;
}
-->
</style>
In this CSS, the overall layout and button design are defined. The element with the ID #vortex represents the rotating area, and the elements with the class square-button represent the individual content areas. While you can freely customize these styles, be mindful of maintaining design consistency.
JavaScript to Display Multiple Content Areas Rotating from Back to Front Using jquery.vortex.js
Next, we will implement the rotation effect using JavaScript. This script runs after the page loads and rotates the specified elements.
Load the jquery.min.js (v1.9.1) and jquery.vortex.js files. Write $(area to be rotated).vortex({options}). The options allow you to set position, speed, etc.
<script src="https://ajax.googleapis.com/ajax/libs/jquery/1.9.1/jquery.min.js"></script>
<script src="jquery.vortex.js"></script>
<script type="text/javascript">
$(window).load(function() {
	$('#vortex').vortex({
		initialPosition: 270,
		speed: 150,
	    deepFactor: 0.8
	});
});
</script>
In this code, the element with the ID #vortex starts rotating from an initial position of 270 degrees, with a speed of 150 and a depth factor of 0.8. initialPosition sets the starting angle of rotation, speed sets the rotation speed, and deepFactor sets the depth factor. You can control the rotation effect in detail by adjusting these options.
HTML to Display Content Areas Rotating from Back to Front
Finally, let’s take a look at the actual HTML markup. This HTML provides the structure needed to apply the rotation effect.
<div class="clWrap">
    <h1>Rotate Content Areas from Back to Front</h1>

	<div align="center">
        <button id="vortex-start" type="button" onclick="$('#vortex').data('vortex').start();">Start</button>
        <button id="vortex-stop" type="button" onclick="$('#vortex').data('vortex').stop();">Stop</button>
    </div>
    <br />
	<br />

    <div id="vortex">
        <div class="square-button"></div>
        <div class="square-button"></div>
        <div class="square-button"></div>
        <div class="square-button"></div>
        <div class="square-button"></div>
        <div class="square-button"></div>
        <div class="square-button"></div>
    </div><!--/vortex-->

</div><!--/clWrap-->
This HTML provides the basic structure to operate the rotation effect. #vortex represents the rotating area, and the div tags inside it represent the individual content areas. Additionally, start and stop buttons are set up to allow manual control of the effect.
Demo Page: Display Content Areas Rotating from Back to Front Using jquery.vortex.js
We also prepared a demo page for you to see the effect in action. You can check it from the link below.
Demo: Rotating Content Areas Using jquery.vortex.js
Refer to this demo and consider how you can utilize it in your project. Experiment with various options and find the best settings for your website.
Source: jQuery Vortex
Conclusion
This time, we explained how to use “jquery.vortex.js” to display content areas while rotating them from back to front. By using this plugin, you can easily add an impactful effect to your website. It is especially effective when visual performance is needed.
I explained it step-by-step to make it easy to approach, so please try it yourself to deepen your understanding. Also, by tweaking the option settings, various expressions can be achieved. Use this article as a reference to create your original effects.
※Please use at your own risk when reusing this content.
Do not use the Google Analytics tag in the head tag of the demo page.
