Easy Customization! How to Beautify the Select Tag Using jquery.nice-select.js
One of the common challenges in web development is customizing the appearance of the HTML select tag. The default select tag has limited styling options, which can lower the quality of the user interface depending on the project. However, with jquery.nice-select.js, this issue can be easily solved!
In this article, we’ll show you how to customize the appearance of select tag elements using jquery.nice-select.js.
Why jquery.nice-select.js?
jquery.nice-select.js is a simple and easy-to-use jQuery plugin. It transforms the standard select tag into a beautiful and user-friendly dropdown menu. With a wide range of customization options, it’s a must-have tool for web designers and front-end developers looking to enhance UI design flexibility.
Customization Steps
CSS Setup
First, load the necessary CSS file, nice-select.css. Add the following code to your project. Here, we wrap the select tag to be customized with the .selarea class. You can change this class name according to your project.
<link rel="stylesheet" href="./nice-select.css">
<style>
body {
  margin: 20px 10px;
  padding: 0;
  font-size: 18px;
  text-align: center;
}
h1{
  text-align: center;
  font-size: 22px;
  line-height: 2em;
  padding-bottom: 20px;
}
.selarea{
  width: 200px;
  margin: 0 auto;
}
</style>
Building the HTML
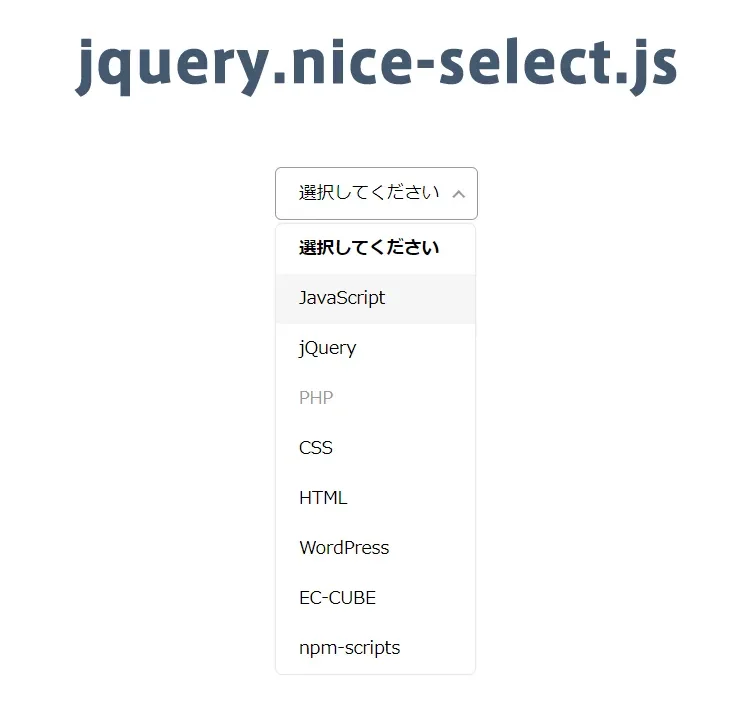
Next, set up the HTML structure. Place the select tag as shown below and prepare multiple option tags. You can adjust the options based on your project.
<h1>Customize the Select Tag Appearance Using jquery.nice-select.js</h1>

<div class="selarea">
<select>
  <option data-display="Please select">Please select</option>
  <option value="JavaScript">JavaScript</option>
  <option value="jQuery">jQuery</option>
  <option value="PHP" disabled>PHP</option>
  <option value="CSS">CSS</option>
  <option value="HTML">HTML</option>
  <option value="WordPress">WordPress</option>
  <option value="EC-CUBE">EC-CUBE</option>
  <option value="npm-scripts">npm-scripts</option>
</select>
</div>
Using jquery.nice-select.js with JavaScript
Finally, add JavaScript to utilize jquery.nice-select.js. Include jquery-2.1.4.min.js and jquery.nice-select.js files, then call $(‘select’).niceSelect().
<script src="jquery-2.1.4.min.js"></script>
<script src="jquery.nice-select.js"></script>
<script>
$(document).ready(function() {
  $('select').niceSelect();
});
</script>
Demo Page: Customize Select Tag Appearance Using jquery.nice-select.js
You can see the actual working example on the demo page below. By viewing the demo, you’ll better understand the capabilities of jquery.nice-select.js.
Demo Page: Customize Select Tag Appearance Using jquery.nice-select.js
Source: jQuery Nice Select
For more information about jquery.nice-select.js, visit the official site below.
Conclusion
Customizing the select tag is an important aspect of web development. With jquery.nice-select.js, you can tackle this task efficiently and attractively. Try the steps introduced in this article to refine the user interface of your website or application!
*Please use at your own risk when reusing this code.
Do not reuse the Google Analytics tag inside the head of the demo page.