unslider.js Guide: How to Display a Clean and Flexible jQuery Content Slider
unslider.js is a lightweight and flexible jQuery content slider library that’s easy to implement.
This article explains how to use unslider.js with concrete code examples.
Previously introduced tools like slick.js and Swiper.js are popular for their rich features and wide reference base.
However, unslider.js is highly recommended for beginners due to its simplicity.
Features of unslider.js
The main features of unslider.js are:
- Lightweight and fast performance
- Easy configuration with a simple API
- Customizable design
- Responsive design support
By leveraging these features, you can easily add a slider and enhance your website’s appeal.
CSS Setup
Basic styling is required to use unslider.js. Below is a sample code.
Load the files unslider.css and unslider-dots.css. Here’s the CSS for the slide area (.banner).
<style>
body {
  margin: 20px 10px;
  padding: 0;
  font-size: 18px;
  text-align: center;
}
h1{
  text-align: center;
  font-size: 22px;
  line-height: 2em;
  padding-bottom: 20px;
}
.banner{
  overflow: hidden;
  width: 400px;
  height: 400px;
  margin: 0 auto;
}
.banner {
  position: relative;
  overflow: auto;
}
.banner ul li{
  list-style: none;
  position: relative;
  float: left;
  width: 400px;
  height: 400px;
}
.banner ul li div{
  position: absolute;
  bottom: 5px;
  text-align: center;
  width: 100%;
}
</style>
<link rel="stylesheet" href="./unslider.css">
<link rel="stylesheet" href="./unslider-dots.css">
HTML Markup
Here’s an HTML example for displaying a slider using unslider.js.
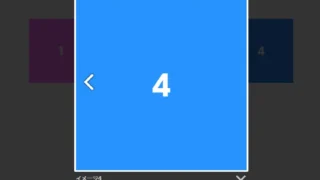
Prepare thumbnail images (1–4.jpg) for the slides. You can freely change them according to your slider content.
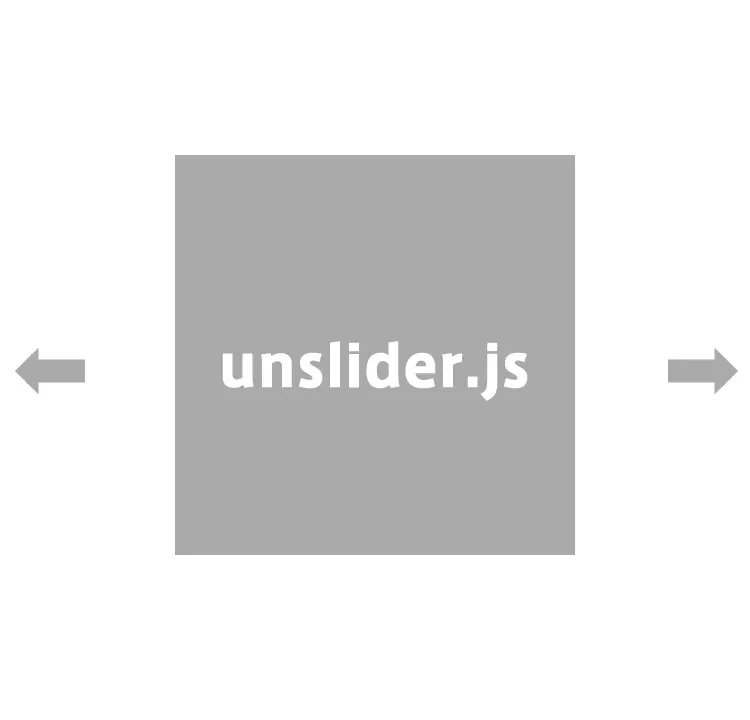
<h1>Clean and Flexible jQuery Content Slider with unslider.js<br>Click "Prev" or "Next" to slide left and right.</h1>

<div class="banner">
    <ul>
        <li style="background-image: url('1.jpg');">
          <div>Slide 1</div>
        </li>
        <li style="background-image: url('2.jpg');">
          <div>Slide 2</div>
        </li>
        <li style="background-image: url('3.jpg');">
          <div>Slide 3</div>
        </li>
        <li style="background-image: url('4.jpg');">
          <div>Slide 4</div>
        </li>
    </ul>
</div>
JavaScript Setup
To run unslider.js, load the jQuery library and the unslider.js file. Below is the basic example.
Load jquery-2.1.4.min.js and unslider.js. Then call $(‘slider-area’).unslider({options}).
You can set auto-slide, “Prev”, “Next”, and more using options.
    <script src="jquery-2.1.4.min.js"></script>
    <script src="unslider.js"></script>
    <script>
      $('.banner').unslider({
        autoplay: true
      });
    </script>
Demo Page: Clean and Flexible jQuery Content Slider with unslider.js
You can check out the demo page using unslider.js from the link below.
Demo Page: Clean and Flexible jQuery Content Slider with unslider.js
Source: Unslider — the super-tiny jQuery slider
Here is the original source:
Unslider — the super-tiny jQuery slider
Conclusion
unslider.js is a handy tool that allows you to create beautiful sliders with simple code.
Use the sample code provided in this article as a reference to incorporate it into your projects.
By extending its functionality, you can further improve user experience.
* Use at your own risk if reusing.
Please do not reuse the Google Analytics tag within the head tag of the demo page.