How to Set A/MX/TXT Records for Sakura Rental Server on Onamae.com DNS
This article explains how to use a custom domain acquired from Onamae.com and configure the A/MX/TXT records of Sakura Rental Server in its DNS settings while continuing to use Onamae.com’s name servers.
Instead of using Sakura’s name servers “Name Server 1 (ns1.dns.ne.jp)” and “Name Server 2 (ns2.dns.ne.jp)”, this method uses Onamae.com’s name servers with Sakura Rental Server.
Configure “DNS Record Settings” under Onamae.com’s “DNS Settings/Forwarding Settings”
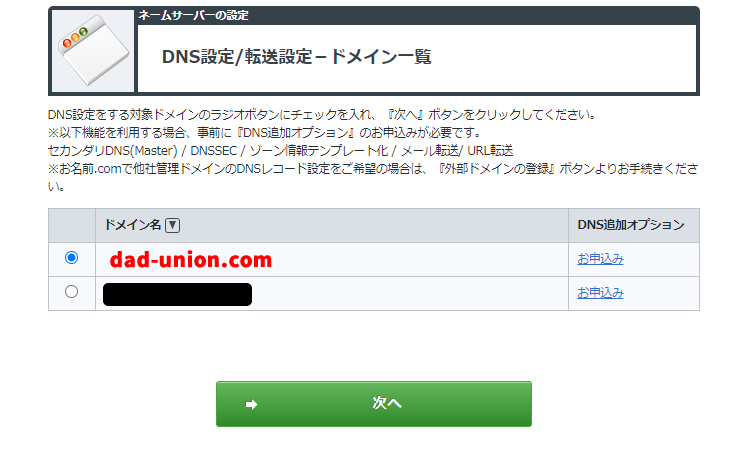
Log in to Onamae.com and select your custom domain under “DNS Settings/Forwarding Settings – Domain List”
On the “DNS Settings/Forwarding Settings – Domain List” screen, select your custom domain and click the “Next” button.
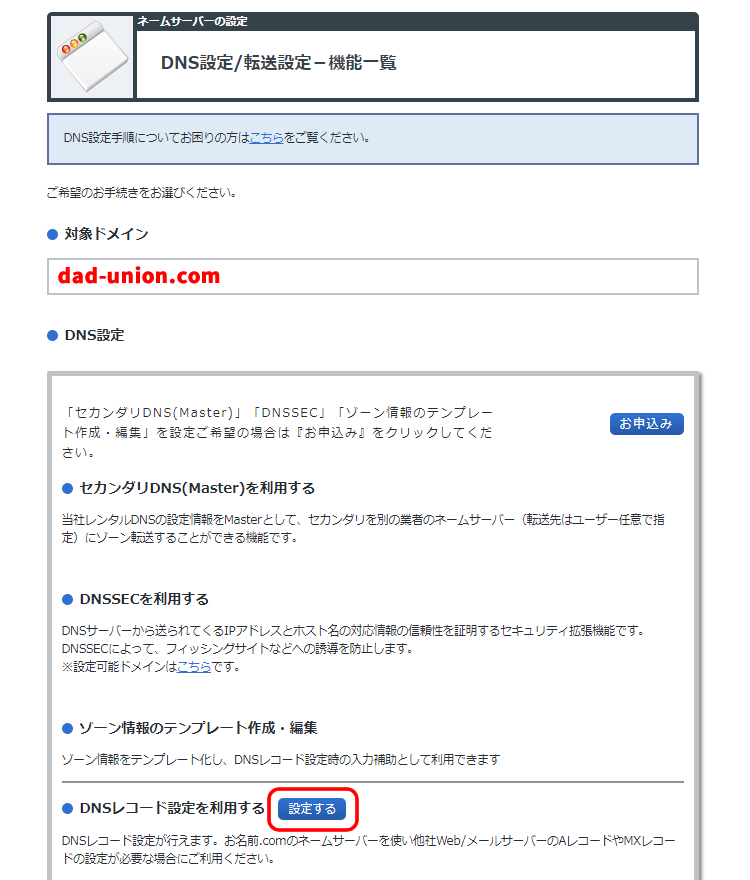
Under “DNS Settings/Forwarding Settings – Function List”, click “Use DNS Record Settings”
On the “DNS Settings/Forwarding Settings – Function List” screen, click the “Use DNS Record Settings” button.
Set A/MX/TXT Records of Sakura Rental Server in the “DNS Record Settings” of Onamae.com
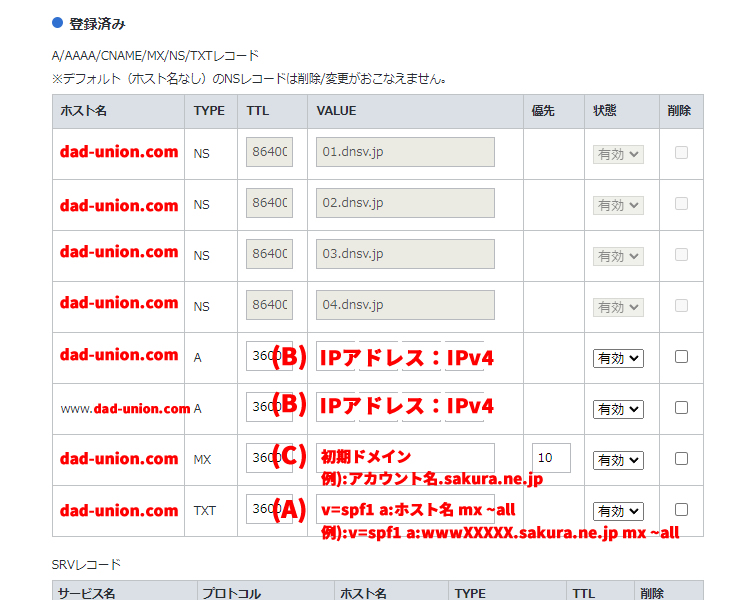
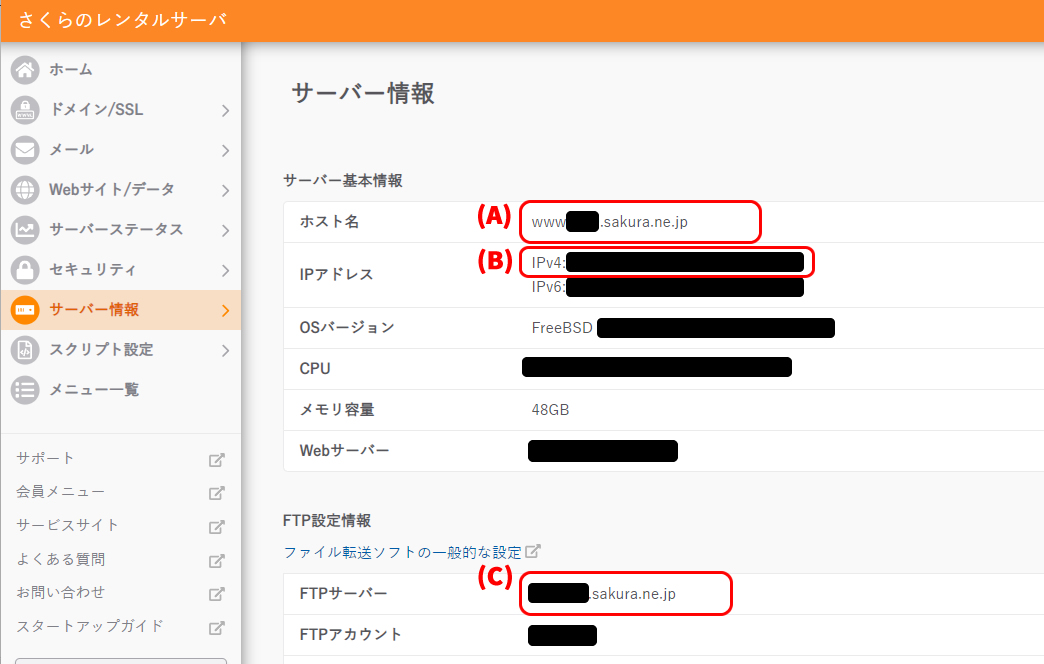
On the “DNS Record Settings” screen of Onamae.com, enter the information found in the “Server Information” section of the Sakura Rental Server control panel.
- Set the A record to the IPv4 address from “IP Address” (B)
- Set the MX record to the initial domain (FTP server), e.g. FTPaccount.sakura.ne.jp (C)
- Set the TXT record to:
v=spf1 a:hostname mx ~all
(Example:v=spf1 a:wwwXXXXX.sakura.ne.jp mx ~all) (B)
Onamae.com “DNS Record Settings” screen
Sakura Rental Server Control Panel “Server Information” screen
Add Your Custom Domain Acquired from Onamae.com to the Sakura Rental Server Control Panel
Log in to the Sakura Rental Server control panel and add the custom domain you obtained from Onamae.com.
Configure “Add a New Domain” in Sakura Rental Server Control Panel
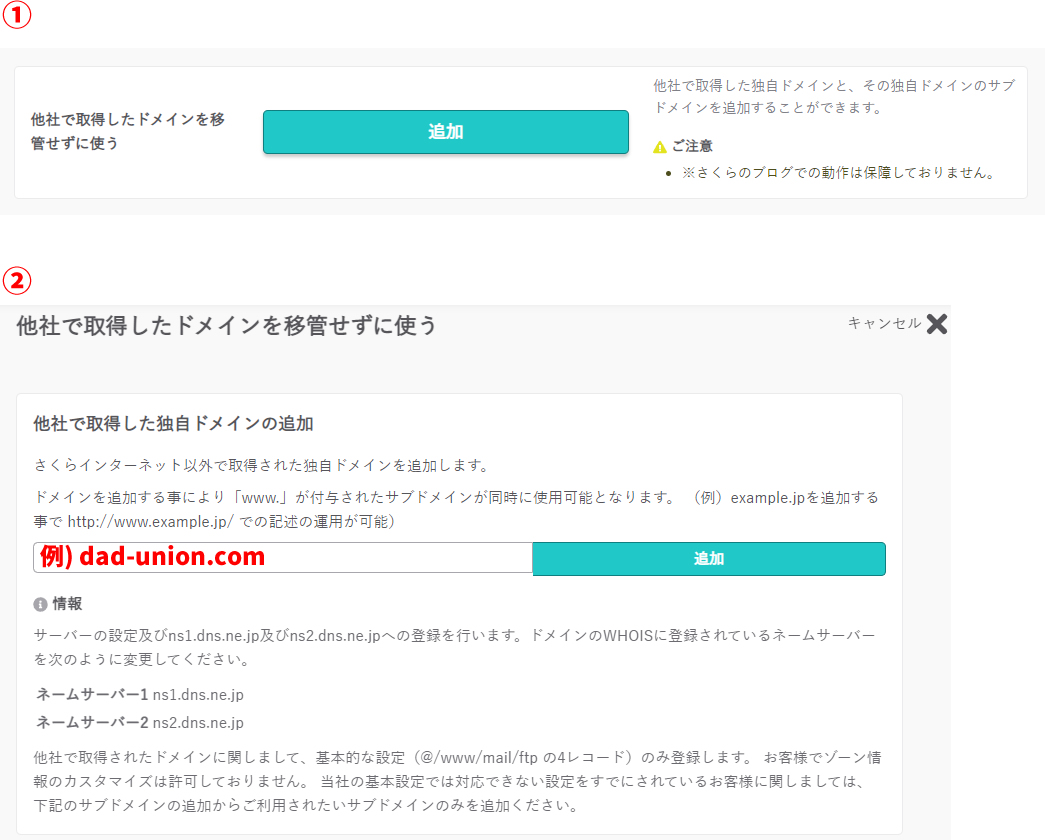
- ① On the “Add a New Domain” screen in the Sakura Rental Server control panel, click the “Add” button under “Use a domain obtained from another provider without transferring it”.
- ② On the screen “Use a domain obtained from another provider without transferring it”, enter the custom domain you acquired from Onamae.com (e.g., dad-union.com) and click the “Add” button.
This completes the setup.
After this, proceed with SSL settings, etc., in the Sakura Rental Server control panel.
* Please use this information at your own risk if reused.