WordPress Guide for Beginners! How to Set and Display Featured Images

Add a section to the WordPress post editing screen to register a featured image, and learn how to display it on the post page.
Add Code to functions.php to Enable Featured Images
First, to display a featured image option in the post editing screen, add the following code to the functions.php file. By adding this code, the featured image option will appear in the post editing screen.
add_theme_support('post-thumbnails');
Once this code is added, the option “Set Featured Image” will appear in the post editing screen.
Post Editing Screen Example
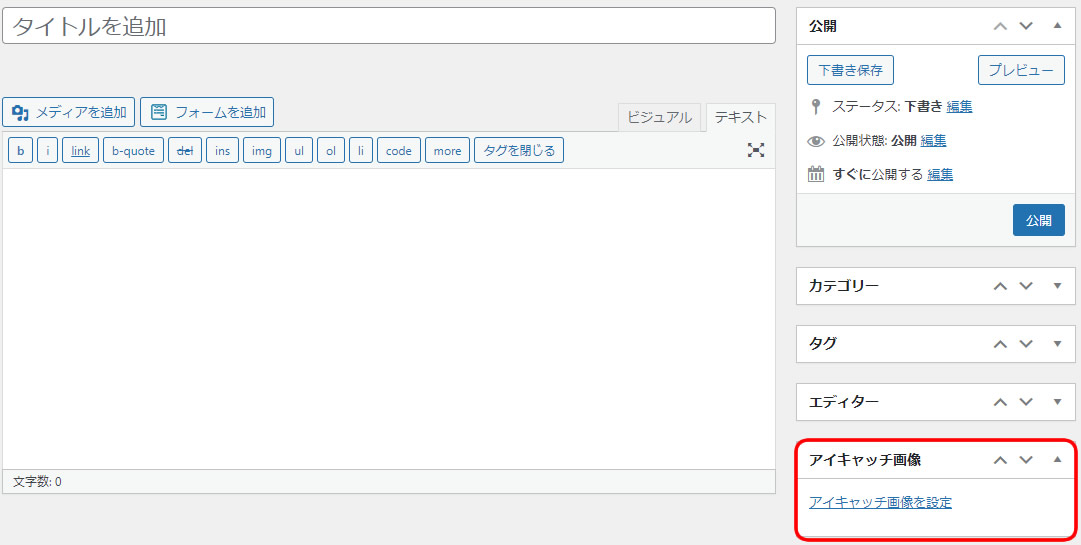
The red box highlights the “Set Featured Image” area.
Display Featured Images in archive.php (Post List Page)
Next, display the featured images on the post list page. By adding the following code to the archive.php file (post list page), the featured image, link, title, and category name for each post will be displayed.
	<?php if (have_posts()): ?>
            <ul>
            <?php while (have_posts()): the_post(); ?>
		<li>
			 <!--Post Link-->
		<a href="<?php the_permalink(); ?>">
<?php
	$image_id = get_post_thumbnail_id();
	// Get featured image URL
	$image_url = wp_get_attachment_image_src($image_id, true);
	if(has_post_thumbnail()):
?>
		   <!--Featured Image-->
<div class="thumb"><img src="<?php echo $image_url[0]; ?>" alt=""></div>
<?php endif; ?>
		<!--Category Name-->
		<div class="cat">WEB</div>
		<!--Title-->
		<h2><?php the_title(); ?></h2>
		</a>
		</li>
            <?php endwhile; ?>
            </ul>
	<?php endif; ?>
Summary
Setting and displaying featured images in WordPress is quite simple, but it’s easy to overlook. Use this article as a reference to effectively utilize featured images on your WordPress site. The explanation is designed to be easy even for beginners, so give it a try.
*Use at your own risk if reusing this content.