Using jquery.screwdefaultbuttonsV2.js to Display Customized Radio Buttons and Checkboxes
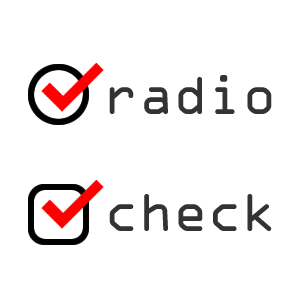
When you visit a website, you often see radio buttons and checkboxes. While these standard buttons are functional, redesigning them can enhance the individuality of a website and leave a strong impression on visitors. In this article, we will show you how to display radio buttons and checkboxes with custom designs using the jQuery plugin jquery.screwdefaultbuttonsV2.js.
What is jQuery.screwdefaultbuttonsV2.js?
`jquery.screwdefaultbuttonsV2.js` is a jQuery plugin used to decorate standard radio buttons and checkboxes with custom images. It offers a high degree of design freedom, allowing you to easily apply styles tailored to your project. This plugin enables you to create sophisticated buttons that are difficult to achieve with just CSS and HTML.
Customizing Radio Buttons and Checkboxes with jQuery.screwdefaultbuttonsV2.js
JavaScript Settings
To use this plugin, you must first configure the settings in JavaScript. Load the `jquery.min.js` and `jquery.screwdefaultbuttonsV2.js` files. Then, set up the custom targets using `$(radio button).screwDefaultButtons({image or size})` and `$(checkbox).screwDefaultButtons({image or size})`. Refer to the following code snippet for guidance.
<script src="https://ajax.googleapis.com/ajax/libs/jquery/1.9.1/jquery.min.js"></script>
<script src="jquery.screwdefaultbuttonsV2.js"></script>

<script type="text/javascript">
$(function(){
	$('input:radio').screwDefaultButtons({
		image: 'url("images/radioSmall.jpg")',
		width: 43,
		height: 43
	});

	$('input:checkbox').screwDefaultButtons({
		image: 'url("images/checkboxSmall.jpg")',
		width: 43,
		height: 43
	});

});
</script>
Place this code within the head tag or at the appropriate location within the body tag of your HTML. This will decorate the radio buttons and checkboxes on the page with the specified images.
CSS Settings
In addition to JavaScript, you will need to style with CSS. Set the CSS for radio buttons, checkboxes, and labels. Add the following CSS to style the buttons and labels.
<style type="text/css" media="all">
<!--
body{
	margin: 0;
	min-width: 980px;
	padding: 0;
}
h1{
	text-align:center;
}
.styledRadio, .styledCheckbox {
	display: inline-block;
}
.example {
	padding: 50px 0 0 20px;
}
label {
	line-height: 43px;
	font-size: 20px;
	vertical-align: 14px;
	padding-right: 20px;
}
button{
	display: block;
}
-->
</style>
This CSS ensures that the labels and overall layout of the buttons are neatly arranged. Adjust it to fit your project.
HTML Settings
Next, let’s look at how to display the customized radio buttons and checkboxes in HTML. We have prepared patterns for customized radio buttons and checkboxes, each with default checked and disabled settings.
<h1>Display Customized Radio Buttons and Checkboxes</h1>

<div class="example">
	<h2>Customized Radio Buttons</h2>
	<input type="radio" name="ex1" id="ex1_a">
	<label for="ex1_a">Radio A</label>
	<input type="radio" name="ex1" id="ex1_b">
	<label for="ex1_b">Radio B</label>
</div>

<div class="example">
	<h2>Customized Checkboxes</h2>
	<input type="checkbox" name="ex2_a" id="ex2_a">
	<label for="ex2_a">Checkbox A</label>
	<input type="checkbox" name="ex2_b" id="ex2_b">
	<label for="ex2_b">Checkbox B</label>
</div>

<div class="example">
	<h2>Default Checked Radio Buttons and Checkboxes</h2>
	<input type="radio" name="ex3_a" checked="checked">
	<input type="checkbox" name="ex3_b" checked="checked">
</div>

<div class="example">
	<h2>Disabled Radio Buttons and Checkboxes</h2>
	<input type="radio" name="ex4_a" disabled="disabled">
	<input type="checkbox" name="ex4_b" disabled="disabled">
</div>
Use this HTML code to easily place customized buttons on your page. Check the demo page to see how the radio buttons and checkboxes are displayed.
jquery.screwdefaultbuttons: Demo Page for Displaying Customized Radio Buttons and Checkboxes
To see how they appear, we have prepared a demo page. You can see how the radio buttons and checkboxes are displayed with custom images at the link below.
jquery.screwdefaultbuttons: Demo Page for Displaying Customized Radio Buttons and Checkboxes
This page allows you to visually confirm the behavior when using the code. Try it out and find a design you like.
Conclusion
The design of radio buttons and checkboxes is an important element in improving the user experience of a website. Using `jquery.screwdefaultbuttonsV2.js`, you can easily apply custom designs and style them according to the design requirements of your project. Try it out in your web project to offer a unique experience to your visitors.
Please note: Use this content at your own risk. Do not reuse the Google Analytics tag within the demo page.
